Setting Up CCBill for Bunny CMS
Required Information:
- FlexForm ID
- Encryption Key (Salt)
- Account Number (e.g., 951908-****)
- Datalink URL with username, password, and IP correctly set in the CCBill admin panel
- Test account for a test sale (email and correct IP)
Get Encryption Key (Salt):
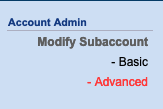
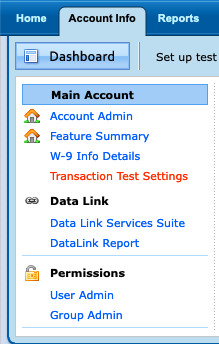
- Go to "Account Info" -> "Sub Account Admin"

- Click on "Advanced"

- Scroll down to the section "Upgrade Security Setup Information" and provide us Encryption Key (Salt)

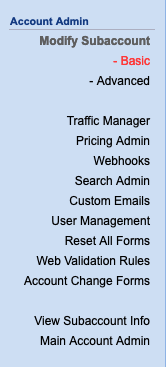
Setup Account:
- Go to "Account Info" -> "Account Admin"

- Click "Basic"
- Set Approval URL: "https://your-network-site.com/thank-you", Denial URL:
"https://your-network-site.com/join"

- Click "Advanced"
- Set Approval Post URL: "https://your-network-site.com/api/postback/ccbill/"

User Management:
- Go to "Account Info" -> "Account Admin"
- Click "User Management"
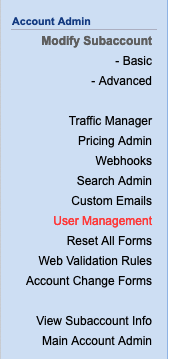
- Set Collect Username / Password -> Hide both Username and Password

Create Data Link Account:
- Go to "Account Info" -> "Data Link Services Suite"
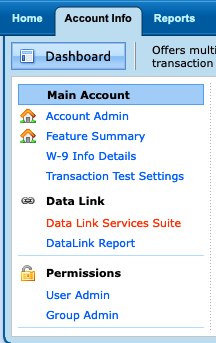
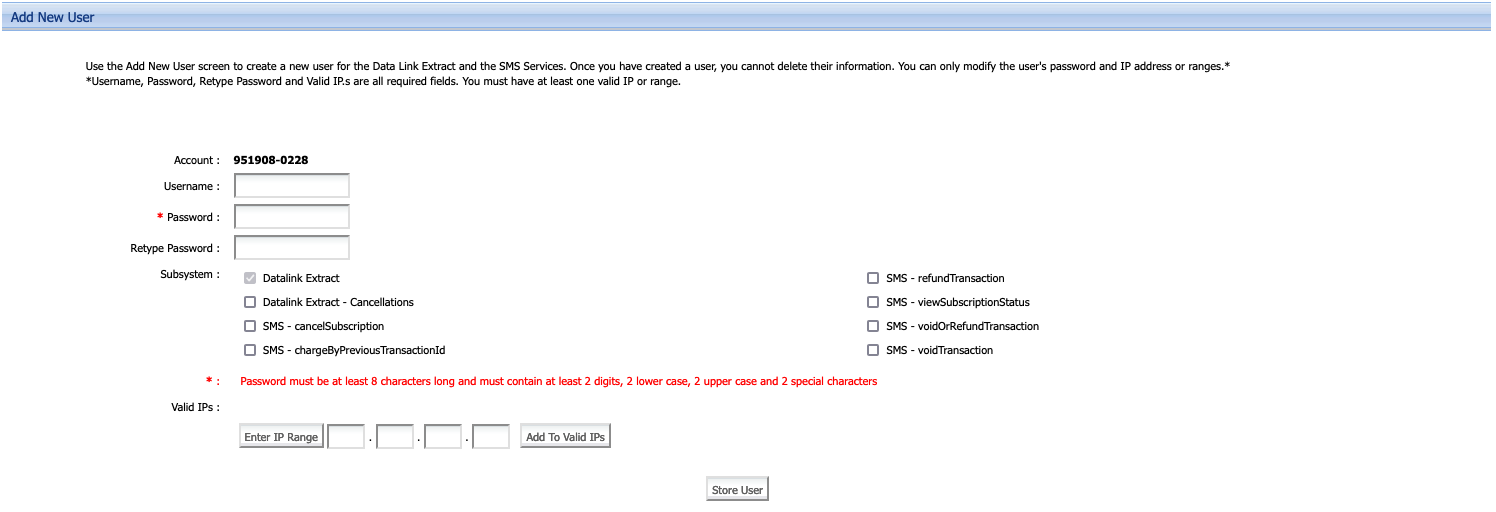
- Click "Add User"
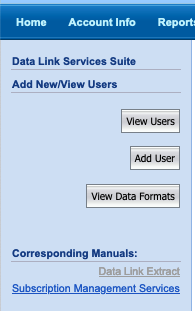
- Enter username, password, and IP of your server, click "Store User"
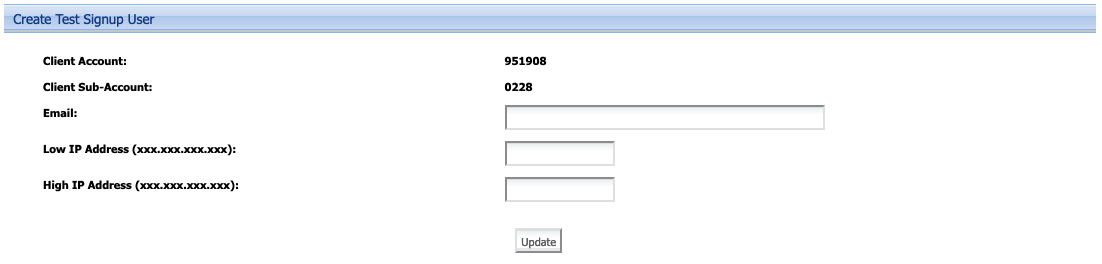
Create Test Account:
- Go to "Account Info" -> "Transaction Test Settings"
- Click "Create New User"
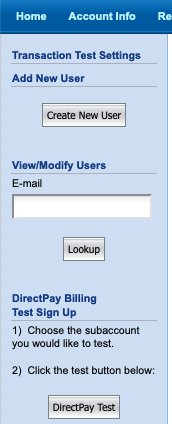
- Enter email for test user and set IP of the test user. Test transactions will be approved only from these
IPs. Click "Update"
FlexForm ID
If you cannot access the FlexForm ID, please contact CCBill merchant support for assistance. Please inform them that FlexForm should support dynamic prices.
Thank you
After you complete all the steps, please inform us of all the parameters, and we will conduct a test transaction. Thank you.